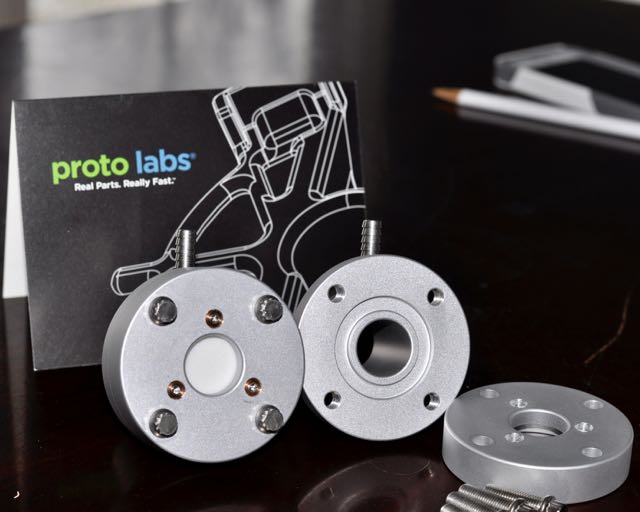
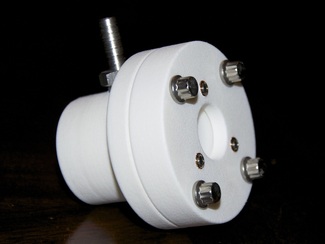
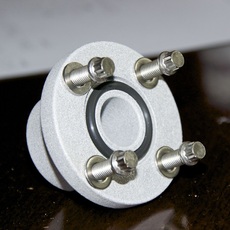
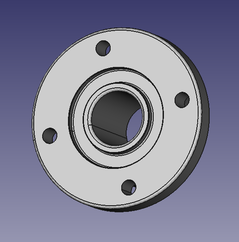
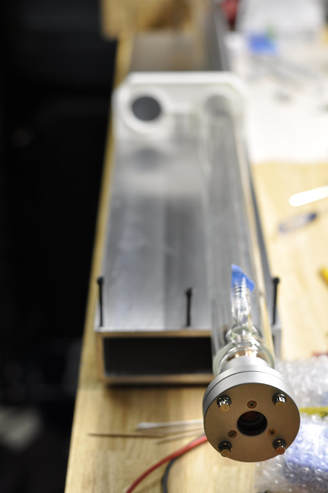
As you can see, there has been some progress: (1) a 36" 6"x2"x1/2" aluminum tube base, (2) 4 rubber feet, (3) 9 10-32 tapped holes to secure the mounting hardware, (4) printed plastic mounting brackets (see below, the white ones are experimental, black ones are in the mail!) (4) One tube has been mostly assembled, including really expensive stainless steel washers ($4/piece stock?! Who else buys thick 1.5" washers I wonder?), and (5) the bubble-wrapped package in the lower right is a Si enhanced silver mirror (10m focal length) and a ZnSe 60% optical coupler. |
0 Comments
I finally got enough money and time together to have these optical couplers fabricated out of aluminum. I had intended to make them out of 304SS, but the cost of fabrication was a little more than double. I did a quick search of the usability of aluminum in a vacuum, and I figure that I'm good to 10^-6, which is very much lower than my lowest operating pressure 10^-3.
So, I received much of my Christmas and birthday money and socked it away for a special time -- and that time came this week. I bought Tygon vacuum tubing, 6-80 adjusters and their bushings, and that got me thinking. It might be time to start thinking about manufacturing those optical flanges. So, I learned how to use FreeCAD and threw together my first 3D model of the flange that connects the optical assembly to the glass resonator. Of course, I didn't want to spend hundreds of dollars having them made in 304SS until I knew I hadn't made a mistake, so I learned about Shapeways.com (Very cool!) and had one printed in hard plastic for a cool $50. It's getting printed now -- the leadtime is a little long at about 2 weeks, but I'm apparently in no hurry.
Today I drafted up the Optical Carrier piece that connects to this flange in about 10 minutes in FreeCAD. After saving for most of this year, I bought and installed the second 3-500ZG triode in the regulator and fired it up to make sure that the "A" regulator circuit worked.
What's more, the borosilicate laser tube design shown in the optical resonator section has been fabricated. All I have to do is drive a few hours to pick it up. I have designed the tube flange, as shown in the same section. I'm waiting on the glass-to-metal sealing company to let me know if that design will be appropriate for their process. Finally, I sourced some very pure oxygen-free copper pipe to serve as electrodes. Since I consider the power supply and current regulator effectively finished (still need another 3-500Z), I began the very different and intellectually challenging optical resonator. I knew around a meter was the longest I could get out of a tube for structural stability and voltage requirements. I stretched that out to 1.2 meters in the design, relying on my future ability to actively control the gas pressure. That is, I should be able to reduce the pressure in the tube so that 20kV can strike both tubes. Then, I will raise the pressure to an operating point of a few Torr.
The next consideration was the tube diameter. I picked a diameter in the multimode-bordering area of a Fresnel number of around 2.0. Anything narrower would waste quite a bit of the beam and I didn't have a need for single-mode operation. It also helps with heat diffusion and a tiny bit with expected power output. Finally I picked a cooling jacket that just looked about right... I am relying somewhat on the thick wall of the cooling jacket (.157") to provide some structural stability to the whole thing. A little weight isn't necessarily a bad thing here. I know everyone is clamoring about the mirror mounts and beam folder assembly -- or at least I imagine you do. More is in the optical resonator section. A very generous local neon company provided me with this neon tube. It's about a foot long, drops about 500V at 20mA and just looks really cool! I think the neon shop owner preferred to remain anonymous. The last thing he told me before I left was, "I don't want to know what you're going to do with it." EDIT: The shop owner kindly offered to link to this blog from their Facebook page. So, I can say now that Let There Be Neon is a pretty classy outfit in Manhattan, NY. |
To Begin...
Welcome to the ESKB. Please check out my projects' tabs above. Right now the laser project is the most fully developed. Archives
September 2017
|